How to See Exactly What's Using Disk Space on macOS
Most guides about Mac storage tell you what's probably filling your drive. This one is meant to actually answer the question for your specific Mac, in order, starting with the fastest checks and working down to the more thorough ones. If you just want a straight answer to "what's using my disk space," start at the top and work down until the numbers explain the gap between what you expect and what df reports.
Each step below builds on the last, and most people find their answer well before reaching the end of the list — but it's worth knowing the full sequence exists, since the categories that show up last (duplicate files, forgotten app containers) are exactly the ones people give up looking for too early.
Step 1: get the real total from Terminal
Before anything else, confirm the actual current state of your disk rather than relying on About This Mac's cached number, which — as covered in more depth elsewhere — can lag behind reality by a wide margin:
- df -h / — real, current used and available space on your Data volume.
- diskutil apfs list — shows the full container and how space is split across volumes.
Step 2: rank your home folder by size
This single command answers "what's big" faster than anything else, and it's worth running before you do any targeted investigation, since it'll often point you straight at the answer without needing any of the more specific commands below:
- du -sh ~/* 2>/dev/null | sort -rh | head -20 — lists your top-level home folder contents, largest first.
- du -sh ~/Library/* 2>/dev/null | sort -rh | head -20 — same thing for Library, which Finder hides and which usually holds a large share of the total.
Step 3: check the categories most likely to be large
Rather than guessing, check the specific folders that are statistically most likely to be your biggest offenders, based on what kind of Mac user you are:
- For anyone: du -sh ~/Downloads and du -sh ~/Library/Caches.
- For developers: find ~ -iname 'node_modules' -type d -prune -exec du -sh {} \; 2>/dev/null and du -sh ~/Library/Developer/Xcode/DerivedData.
- For Docker users: docker system df, which breaks down images, containers, volumes, and build cache separately.
- For AI/local LLM users: du -sh ~/.ollama/models and du -sh ~/Library/Caches/lm-studio 2>/dev/null.
- For anyone with automatic backups: tmutil listlocalsnapshots / to check local Time Machine snapshot size.
A note on what each command is actually good at
It's worth being explicit about the tradeoffs here rather than treating every command as interchangeable. df is instantaneous but only gives you a total, not a breakdown. du is slower on very large folders (it has to walk the whole tree) but gives you exact per-folder numbers. tmutil and docker system df are specialized — they know about data structures (snapshots, images) that a generic file-size scan can't see into at all. Using the right one for the right question is most of what makes this process fast instead of tedious.
Step 4: use Finder's built-in size sorting as a cross-check
Finder can sort by size, but only within a folder you've already opened — it won't scan recursively across your whole disk for you. Open a Finder window, switch to List view, and click the Size column header to sort. It's most useful as a spot-check against what Terminal already told you, not as your primary tool, since it's slow to calculate folder sizes and doesn't show anything under ~/Library by default unless you've already made hidden files visible with Command+Shift+Period.
Step 5: find duplicate files, a category none of the above catches
Neither du nor Finder's size sort will tell you that the same 2GB video file exists in three places. Finding true duplicates requires comparing file contents, not just names or folder locations, which is slow to do by hand — checking even a modest photo library manually isn't realistic. This is one of the few categories where a dedicated tool genuinely outperforms manual commands, since it needs to hash file contents to confirm true duplicates rather than just matching file names, typically doing a cheap size comparison first and only hashing files that already match on size.
If you want to attempt a narrow version of this manually, fdupes (installable via Homebrew with brew install fdupes) can scan a specific folder and report duplicate files by content hash — useful for checking one folder like Downloads or a Photos export directory, though it's not really practical to point at your entire disk given how long a full content hash pass over hundreds of gigabytes can take.
The most common real-world source of duplicates on a Mac isn't malicious or careless behavior — it's ordinary workflows that naturally create copies. Exporting the same video at two different resolutions, downloading an email attachment you already had saved elsewhere, or restoring an old backup into a folder alongside files that already exist all quietly produce genuine duplicates without anyone intending to waste space. Over several years of normal use, these small everyday habits compound into a surprisingly large amount of pure redundancy.
Doing all five steps in one pass
Running through all of the above manually takes real time, and it's easy to miss a category — most people forget to check local snapshots or Docker until something reminds them. Reclaim runs the equivalent of all five steps in a single scan: it maps your whole disk into a sized, categorized view, finds true duplicates by hashing content, and separates dev caches, AI model files, and app leftovers into their own groups automatically, without you needing to remember which command applies to which situation.
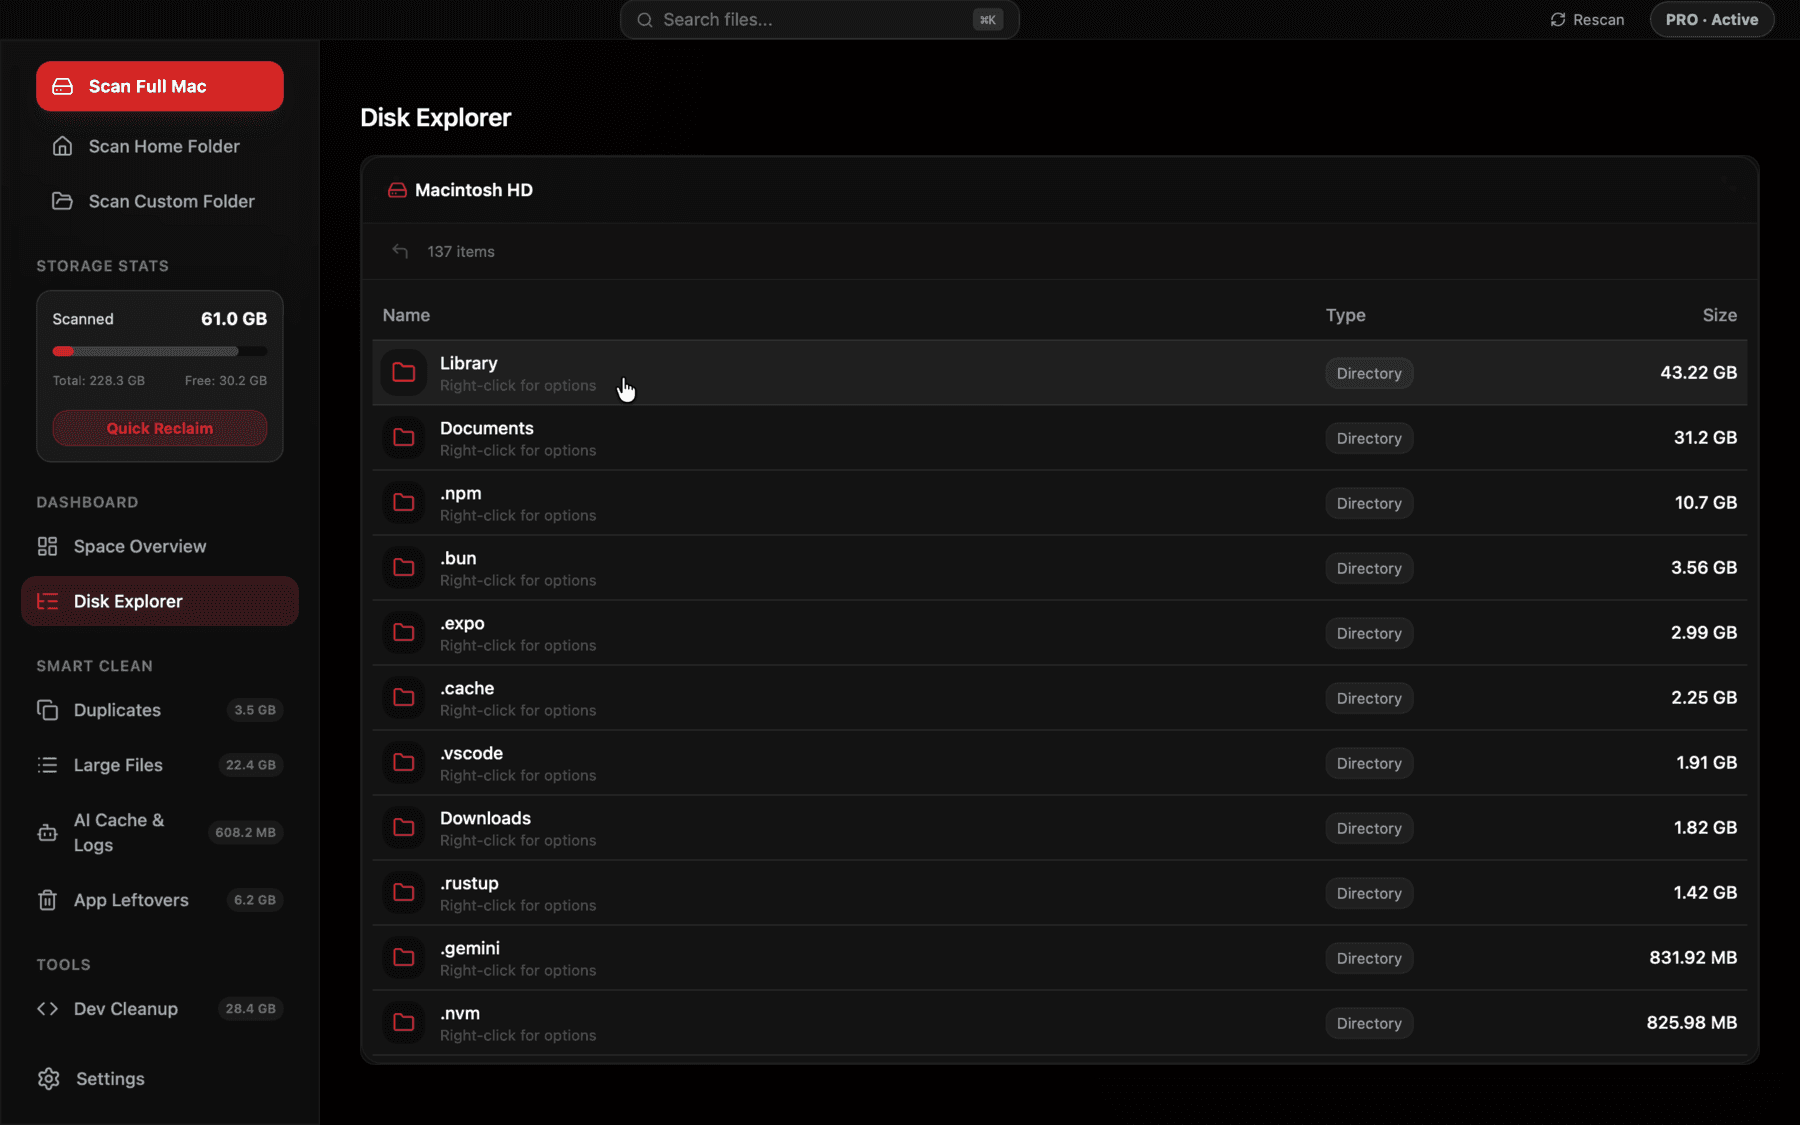
One scan ranks everything on your disk by actual size, the same idea as chaining several du commands, done automatically and kept up to date.
What to actually do with what you find
Prioritize by both size and confidence: clear regenerable dev caches and old installer files first since there's no real risk, then move to duplicates once you've confirmed the tool used real content hashing rather than just filename matching, and leave anything you don't recognize under Application Support or Documents until you've checked what it actually is. A methodical pass in this order usually clears the bulk of reclaimable space in under twenty minutes, even on a Mac that's been accumulating clutter for years.
It's also worth resisting the urge to delete things purely because they're large. A 40GB Photos library or a 15GB video project file is large because it represents real content you created or captured — it isn't waste the way a duplicate installer or a stale node_modules folder is. Size alone isn't the signal to act on; size combined with knowing exactly what a thing is and whether you still need it is what actually makes a deletion safe, and that combination is what every step above has been building toward.
A word on watching this over time, not just once
Running through these steps once solves today's problem, but disk usage on an actively used Mac is not a static thing — it changes every time you install a dependency, pull a Docker image, or download a model to try out. Treating this as a one-time investigation misses that the same categories (dev caches, snapshots, Docker) will accumulate again over the following months at roughly the same rate they did before, just starting from a lower baseline right after cleanup.
The people who avoid repeat low-disk-space warnings tend to be the ones who check periodically rather than only when forced to by a system alert — a quick look every month or two at the same handful of categories catches buildup while it's still small and easy to deal with.
Step 6: check Photos and Messages libraries specifically
If you're a heavy photo or video user, the Photos Library package itself is worth checking directly, since it can be one of the single largest items on a whole disk and doesn't always get properly reflected as "Photos" in About This Mac if Optimize Mac Storage has partially offloaded originals to iCloud. Run du -sh ~/Pictures/Photos\ Library.photoslibrary to see its real current size on disk. Similarly, if you use Messages heavily, du -sh ~/Library/Messages/Attachments shows accumulated media sent and received over iMessage, which tends to be forgotten entirely since it doesn't map to an app you'd think to check.
A note on what not to bother checking
Not every folder is worth manually investigating — some genuinely small, fixed-size system folders (like /private/var/db or /usr/local on a machine without Homebrew) rarely contribute meaningfully to a storage problem, and time spent auditing them is usually better spent on the categories in Step 3, which account for the overwhelming majority of reclaimable space on most Macs.
A reasonable rule of thumb: if a folder's total is under a few hundred megabytes, it's rarely worth further investigation unless you have a specific reason to suspect it. The gigabyte-and-up folders are almost always where the real story is, and that's exactly where du -sh with sort -rh naturally points your attention first.
Frequently asked questions
What's the single fastest command to find what's using disk space on a Mac?
du -sh ~/* 2>/dev/null | sort -rh | head -20 gives you your home folder's biggest contents ranked by size in seconds, which is usually enough to spot the main offender immediately.
Does Finder show real-time disk usage sorted by size?
Only within a folder you manually open and sort by the Size column — it doesn't scan your whole disk recursively, and it hides ~/Library by default, so it misses a lot of what's actually large.
How do I find duplicate files on a Mac?
Reliable duplicate detection needs to compare file contents (via hashing), not just file names, since two files can have the same name but different contents, or different names but be byte-for-byte identical.
What does docker system df show?
It breaks down disk usage by Docker images, containers, local volumes, and build cache separately, which is useful since Docker Desktop's own UI doesn't always make this breakdown obvious.
Should I check local Time Machine snapshots even if I don't use an external backup drive?
Yes — macOS creates local snapshots automatically as part of Time Machine even without an external drive attached, and they can hold significant space without appearing as a normal file anywhere.
How often should I check what's using my disk space?
There's no fixed schedule, but checking whenever you get a low-space warning, and roughly every few months if you do active development work, catches most buildup before it becomes a real problem.
See exactly what’s using your disk space.